 |
| Panoramas effect photo taking |
 |
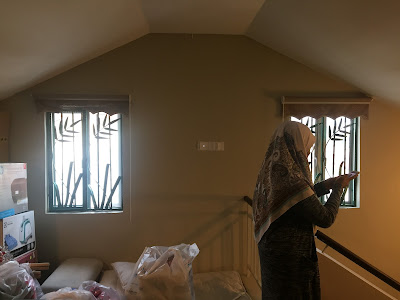
| opening (two window) in the loft |
 |
| loft view |
What is loft?
A loft can be an upper storey or attic in a building, directly under the roof.
Building a loft consists of plenty of accurate measuring, purchasing the proper wood type and length, buying the correct bolts and screws, and assembling your loft in the proper area.
Plan of loft

FRAMEWORK
INSTALLATION
1. Wall stud installed
2. Floor joist installed
3.Ceiling joist installed
4. Rafters installed
5. Bracket installed
1. Wall stud installed
2. Floor joist installed
3.Ceiling joist installed
4. Rafters installed
5. Bracket installed
WHAT IS THE WHOLE STEPS TO INSTALL A
LOFT?
1) Steel beams and supporting floor beams are installed.
2) Floor joists and floor boards are installed.
3) Dormer window is constructed and roof lights fitted.
4) The loft room is insulated.
5) Internal partitions are built and plasterboard is fitted.
6) The ceiling is cut out and the staircase is fitted.
Functions of loft
- chill-out zone
- office space
- bathroom
- bedroom
- studio
- storage
 |
| Example Loft: BEDROOM |
Loft labeling
Important details (recommended)
 |
| The biggest loft you can get |
*best pitch angle 45°
*minimum ceiling height (2.1m)
*minimum thickness of insulation fabric wool (270mm)
*minimum ceiling height (2.1m)
*minimum thickness of insulation fabric wool (270mm)
 |
| oversea house doing the ventilation for loft |
Benefits of installing a Loft
(1) The opportunity to create more living space
(2) Increasing the value of your home by up to 20%
(3) Avoid eating up the garden with an extension
(4) Use the extra space for whatever you need, including the popular bedroom
(1) The opportunity to create more living space
(2) Increasing the value of your home by up to 20%
(3) Avoid eating up the garden with an extension
(4) Use the extra space for whatever you need, including the popular bedroom
Loft Conversion Planning Permission
(1) There is to be no extension of the roof space
(2) There is to be no extension higher than the top of the roof
(3) All materials used should be in keeping with the property’s look
(4) There will be no verandas, balconies or raised platforms.
(1) There is to be no extension of the roof space
(2) There is to be no extension higher than the top of the roof
(3) All materials used should be in keeping with the property’s look
(4) There will be no verandas, balconies or raised platforms.
Personal Critical Thinking (Extra Information)
These questions come out when I doing my work......
Question 1:How can I Convert my Loft With a Low Head Height?
Solution 1: Raise the Roof
This would involve removing part or whole of the existing roof, and rebuilding it to give the required height and structure. This is structurally feasible, but the major problems are the high cost and getting planning permission approval. If the whole roof area needs removing, a covered scaffold structure, to protect the house from the weather during the works, would also be required.
Solution 2: Lower the Ceiling in the Room Below
The ceiling height in some rooms in older properties may be 3m or more, so if the roof space height is limited there is the option of lowering the ceilings below, providing it still allows at least 2.4m. This will require all the existing ceilings in question to be removed, causing much mess. With this method a plate will need to be bolted to the wall using shield anchors or rawlbolts, for the new floor joists to hang from. There is also a need for a suitable tie between the roof structure and the dwarf wall formed, to prevent the roof spreading.
Question 2: How to insulate your loft?
1) Calculate how much loft insulation you need
2) Insulating your cold water tank (option)
3) measure the depth of joist then fit the insulation loft
5) lay on top of joist
6) press down lightly
7) cut and allow ventilation.
 |
| FABRIC WOOL |
 |
| INSTALL THE FABRIC WOOL BETWEEN THE JOIST |


No comments:
Post a Comment